Applying Filters
Each Object Log List panel offers a number of pre-defined filters that filter and order the target data records in to the most useful standard display styles. However there are instances where a more specific filter is required to extract details under some combination of custom criteria. Each panel includes a filter selection that is titled ALLOW FILTERS and it is these entries that allow the User to define their own custom selection filters. The following is an example of filters applied to the Incident Log.
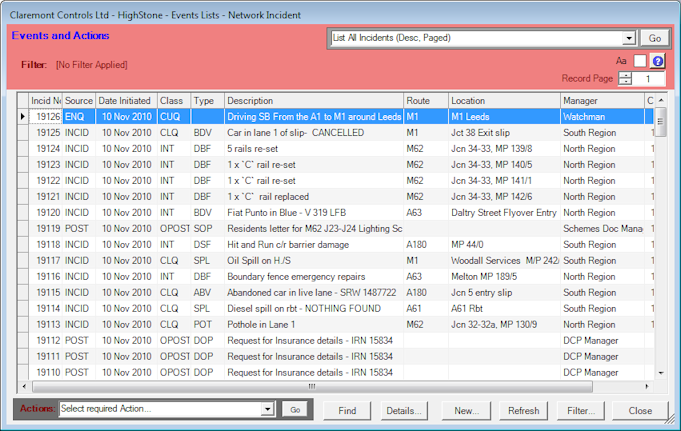
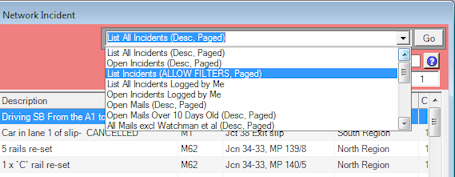
Select List All Incidents (ALLOW FILTERS, Desc Paged) from the drop down box in the top right of the panel and click Go.
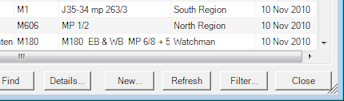
This action will activate the Filter... command button at the bottom right of the Grid Panel. Click on the Filter... button.
The Report / Display Filter panel will be displayed. This panel will list all the data parameters that may be referenced in Select and Sort actions on the current List Log. A full list of all fields for each List Log is available - Filter Fields by List Log.
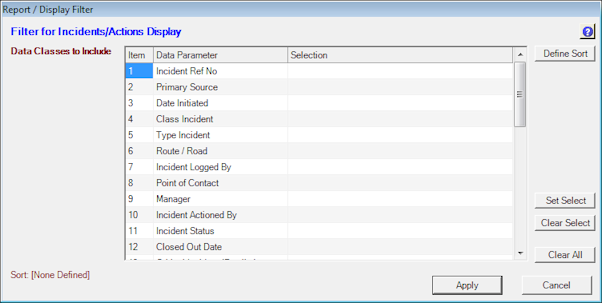
Select the Data Parameter that you want to filter on by clicking on the relevant row and click Set Select. This will open up the following Parameter Select Definition window.
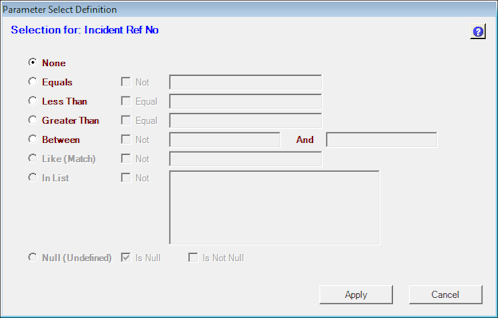
There are various options displayed to define what information is retrieved for this field. Only Select Criteria that are relevant to the field being filtered will be available. Ones that are not available will be greyed out.
- None is the default selection and will not apply any filter to the field
- Equals is used to locate a specific value for the field. Depending on the field being filtered, this field will allow you to select a specific numeric value, or date, or True/False values. When the target parameter is a text entry this option allows the selection of a specific text value, but this must be the full matching text entry; pattern matching and partial text selection are not available under this option. If the Not field is ticked, all values apart from the value entered will be returned.
- Less Than returns values less than that entered. This is usually used for numerical values and dates. If the Equal field is ticked, all values less than and equal to that entered will be returned.
- Greater Than returns values greater than that entered. This is usually used for numerical values and dates. If the Equal field is ticked, all values greater than and equal to that entered will be returned.
- Between returns values within a range (e.g. numeric and date ranges). If the Not field is ticked, all values not within the range entered will be returned
- Like (Match) returns results that contain partial information. It is only available when filtering on text fields, most commonly used when the precise search parameter is NOT known. Partial character matching and wildcard characters can be used by adding a * star sign to the beginning / end of limited text, or using ? for single character wildcard matching. Specifying an entry East* will select all records where the field starts with the letters "East": "East Wing", "Eastbourne". By putting the * character before and after the required letters the serach will select records where the match is found anywhere within the target entry, thus *East* will match a record holding "The vehicle was traveling East along the carriageway". The ? character may be used as a single wildcard character in the search condition.
- In List If the field being filtered has a list of values attached to it, you can use In List to select specific entries, multiple selections can be applied as required.
- Null allows two options and allows the selection of
records where the target field has no value. This search facility is
applicable to data fields that hold text values, or date values.
- Is Null the field is blank
- Is Not Null the field contains data
When searching for matching text values the character case is ignored - upper and lower case characters will always match a specified selection. Some database systems use the characters % and _ in place of the * and ? characters more usually associated with text pattern matching. The User may specify in either form as HighStone will automatically convert the entered characters if this is required.
Filters can be created based on several fields to narrow the results as required. For a record to be included in a returned selection list then all defined conditions on the definition must be true.
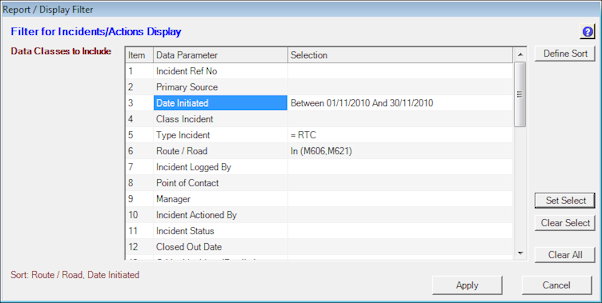
The command buttons to the right of the panel can be used to manage the entries:
- To remove a specific entry, highlight the relevant row and Click Clear Select.
- To remove all filter criteria and restore an empty definition Click Clear All.
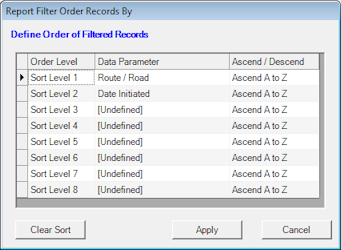
The returned records can be sorted into a required specified order. Click Define Sort to make the necessary selections.

Select from the drop-down parameter lists to define the required sorting priority; the first level, second level sorting etc. It is often useful to return records in a Descending order - thereby ensuring the most recent entries are listed at the start of the display. When the specification is complete Click Apply to save the definition and return to the selection definition panel.
Once all required Select and Sort criteria have been defined, Click Apply to close the prompt panel and display the results on the grid panel, as below.
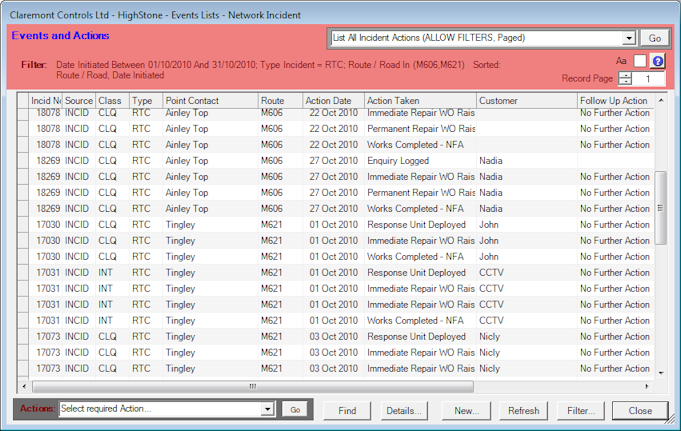
The panel shows the selection and sorting criteria applied in the header area of the panel. If no data records appear then no records meet the filter criteria specified; if necessary return to the filter definition by clicking on the Filter... button to revise the selection.
 Extended Filter
Functionality
Extended Filter
Functionality