Create New Incident
Click on the *New button on either the Incident Log List Panel or the Incident Log Details panel
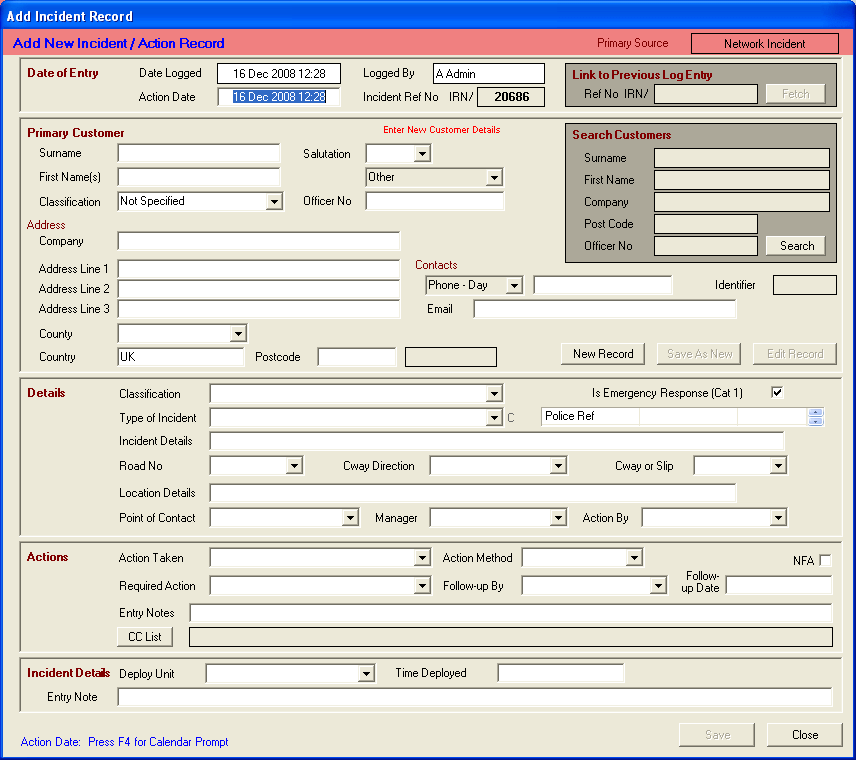
The Add New Incident panel is split into 5 sections
-
Date of Entry
-
Primary Customer
-
Details
-
Actions
-
Incident Details
Date of Entry
Records the date and time that the incident is first entered into the database (Date Logged), the Date and time that the Incident was first notified (Action Date), the name of the person logging the data (Logged By) and the allocate Incident Reference Number (IRN) which is a unique identification for this incident.
Primary Customer
Enter the details of the Person / Organisation who have notified the Incident Centre about the Incident.
Details
Enter the Incident Details
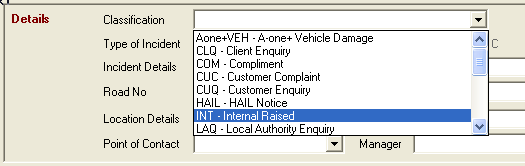
Classification - Select the appropriate Incident Classification from the dropdown list
Is Emergency Response - Tick the box if the incident requires an emergency response
Type of Incident - To the right of the Type of Incident dropdown box is a letter (C, B or A) which indicates the contents scope for the dropdown list.
-
C – The concise list restricts the options to the most commonly selected options
-
B – A broader list that includes some less commonly selected options
-
A – Includes the complete list of options
Pressing the F6 key, whilst the cursor is on the Type of Incident field causes the list to change from the C to B to A options
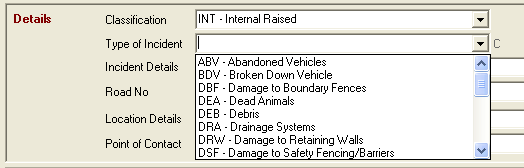
Select the appropriate incident type from the dropdown list. Typing the abbreviated code selects the specific incident type. (e.g. DSF for Damage to Safety Fencing/Barriers)
Road No, Carriageway Direction, Cway or Slip - Select the appropriate information from the dropdown lists
Point of Contact, Manager and Action By - Select the appropriate information from the dropdown lists
Actions

This section records the initial actions taken when the incident is first recorded.
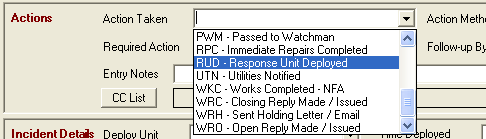
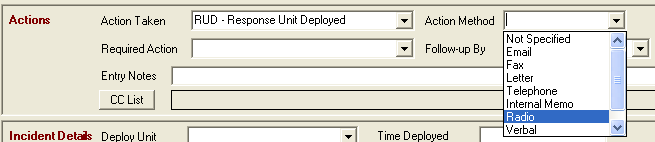
Action Taken - Select the appropriate action from the dropdown list. Typing the abbreviated code selects the specific incident type. (e.g. RUD for Response Unit Deployed)
Action Method - Select the appropriate action method from the dropdown list
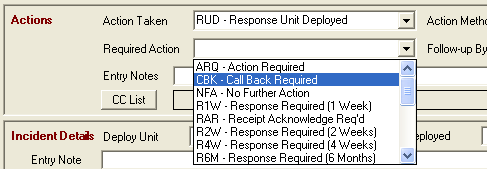
Required Action Taken - Select the appropriate action from the dropdown list. Typing the abbreviated code selects the specific incident type. (e.g. CBK for Call Back Required)
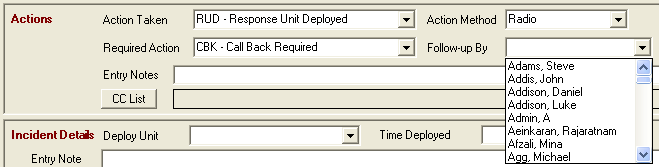
Follow-up by – Select the person responsible for following up this action from the dropdown list
If no further action is required, tick the NFA box.
If a follow up date is appropriate enter that date in the Follow Up Date box.
Add any information relating to this action in the Entry Notes box.
CCList - This button opens a pop up panel listing the eligible names. Highlight those required and click the Select button1
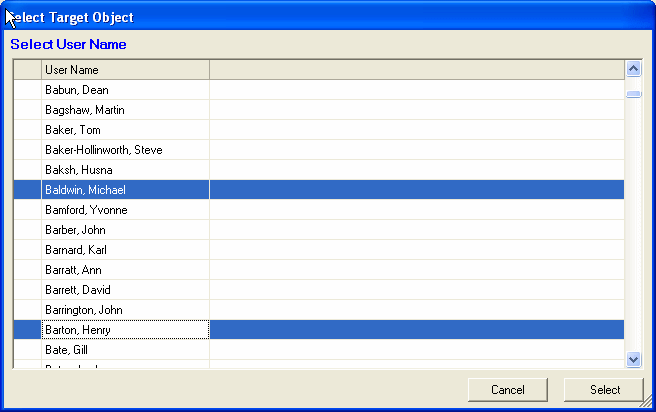
The selected people will then find this incident flagged in their personal internal action list
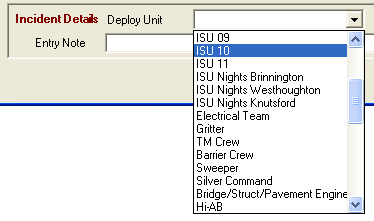
Incident Details
![]()
Deploy Unit – Select the unit from the dropdown list.
Add the time deployed (Time Deployed – F4 and F6 Prompts are available for prompting for a date / setting the current date / time)
Add a note pertaining to the deployment (Entry Note). This entry note will be the first of a series of notes which build up a record of the incident.
Click the Save button
The Incident Entry Panel is now replaced by the Incident Details Panel for this new Incident.