Adding Timesheet Allocations
To add a New Allocation click on the New Allocation command button.
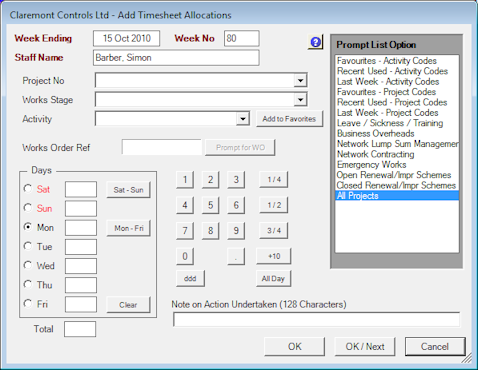
Each Allocation is entered by completing the following three levels of coding:
-
Project Number – a series of defined Contract Codes that encompass all activities – including Project Work, Management Responsibilities, Leave, Sickness etc.
-
Works Stage – a sub-division of the above entry. In some cases a Project Number may have only one Works Stage associated with it – in such cases this single item is taken by default.
-
Activity – a final sub-division under the Works Stage. Again in some cases only one Activity may be associated with an Activity in which case this is taken by default.
If the Project Number pull-down is empty, click on the All Projects option under Prompt List Options. This will populate the pull-down list; by default HighStone will restore the last selection here when the Timesheet Allocation panel is opened again.
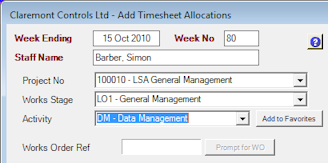
Set the required selection for Project Number, Works Stage, Activity.
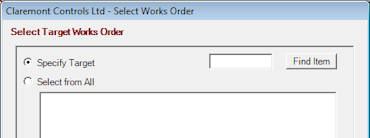
Some Project Codes require the specification of a specific Works Order Number before the allocation will be accepted – typically for all Network Engineering activities. If this is the case then the Prompt for WO command button will be active.
To specify a Works Order, click on the command button and either enter the required number directly, or select from a prompt list.
To specify the actual Hours against the allocation click on the relevant Day option button, and then enter the hours in the adjacent text box. Hours should be record to the nearest quarter hour. Enter a value of three-quarters of an hour as 0.75.
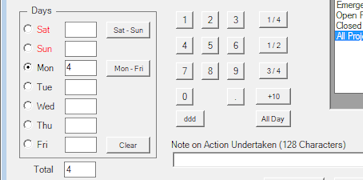
As an alternative the button pad may be used to enter a value for Hours, and part hours, into the current hours text box. The other buttons perform the following sections:
-
+10 – will add ten hours (?) to the current hours entry
-
ddd and . – will swap the button entry for Hours into a sequential or digit mode (rather than just prompting a full hour value into the field). The . will enter a decimal point in the field.
-
Quarter Hours will add the relevant proportion to the current hours value.
-
All Day – will post an entry for a full day in the current field.
-
Mon – Fri - will replicate the current hours entry across all five days.
-
Sat – Sun – similar option but just for these two days
The panel will accept Hour entries across any number of Days in the week. Thus a full week logged as On Leave may be entered on a single panel (and entered by pressing All Day pulled by Mon – Fri).
The Notes text box may be used to record a short note on the activities undertaken (up to 128 characters). This field may be mandatory for some Project Classifications and hence will be required. HighStone will not accept trivial entries in this field when an entry is required/made – so always enter something meaningful. Any Note entered will be applied to each of the Daily Allocations entered on the panel (if separate Notes are required for different Allocations then individual entries will have to be made).
To accept the entry when all is complete, click on the OK command button – this will accept and close the panel. If preferred, use OK / Next to save the entry but leave the panel open for another entry.
HighStone will apply validation to all entries made on the panel (the exact level of validation will depend on the application configuration). The following rules are typical:
-
No allocations allowed outside the dates a Staff Member is registered on the system (as defined on the Staff Details display)
-
Allocations outside recorded Start / Finish dates for selected Contract Project Schemes will be rejected. This may show as a warning prompt, or a mandatory refusal to save the entry.
-
Similar limitations are applied to Works Order selections. Typically selections will be refused where an allocation is attempted for a date either before a Works Order is started, or after it has been closed.
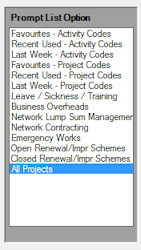
The Prompt List Option section is used to target the selection of Project Numbers on the first coding pull-down. Included in this are facilities to:
-
Recall Project / Activities entered on previous weekly timesheets
-
Set and Recall specific Project / Activity selections under a Favourites selection. Use the Add to Favourites command button to include the current selected entry in your personal favourites list (such nominations can be removed at a later date).
As Allocations are added to the system they will be listed in the Weekly Timesheet Display
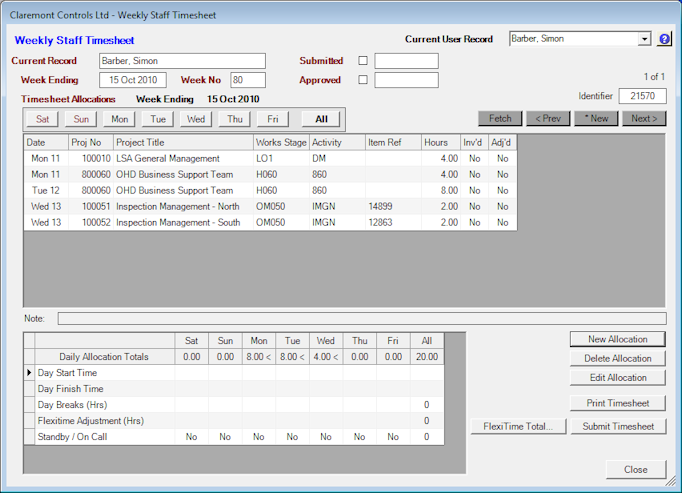
The command buttons for Delete and Edit allow existing entries to be adjusted / removed as required.
Repeat the allocation steps until the Timesheet is complete for the week. Once the Timesheet is complete and correct, click on the Submit Timesheet command button to accept it and pass it on for approval by your line manager. Timesheets cannot be Approved by a Manager until this is done. Once submitted, Timesheet allocations cannot be changed or added to. It is possible to reverse a submission (click on the command button again to ‘un-submit’ the Timesheet) to make any corrections. However, this step will not be possible once the Timesheet has been approved by the line manager.
The current status of the Timesheet is shown in the header section of the panel.